
A task's timer
The timer saves you from entering your time afterwards. You start it when you begin a task; when you stop it, it writes a line in your timesheet: date, hours, client and type of work.
Before you start
- Your account must have an agent record in this firm, and the Create right on Timesheets (chapter 2). Otherwise, the task's record shows Timer unavailable, with the reason.
- To read the written line afterwards in Timesheets, you need the Operations module.
- Open the task, and choose its Type of work if it is not set yet. A task created by a template reuses the template's.
- Click Start the timer. The counter runs; you can change the type of work next to it.
- When you have finished, click Stop and save. A message confirms the hours written, for example "Timesheet: 0,50 h saved".
- To forget this time, click Cancel instead: nothing is written.
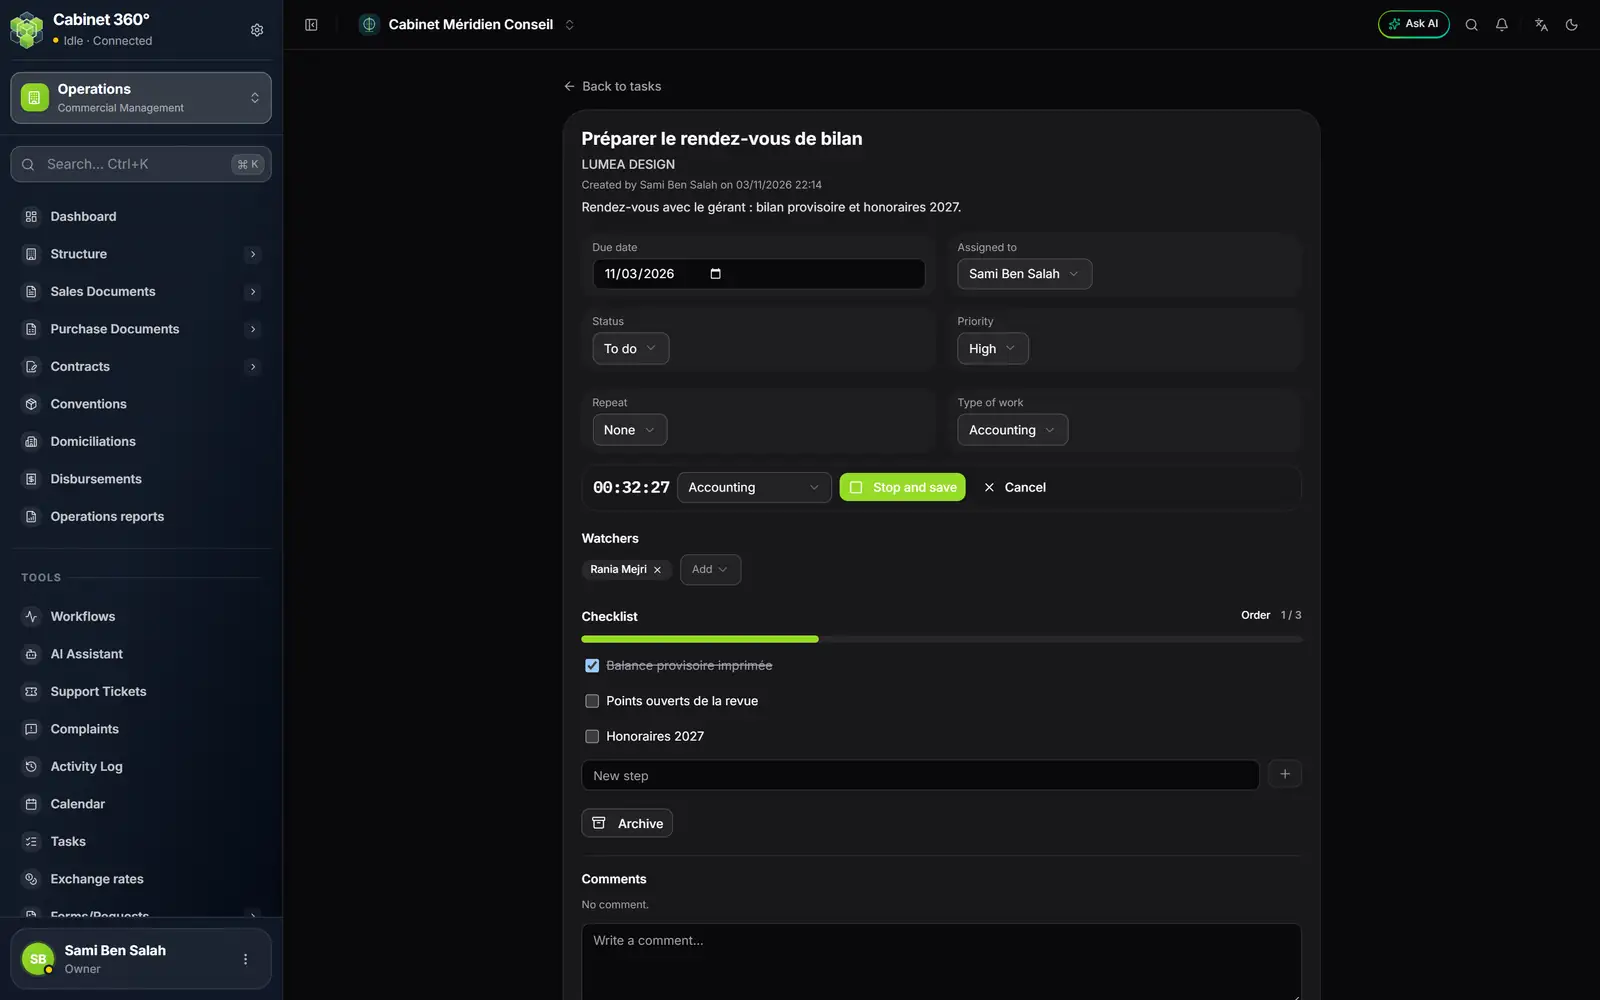
- 1. Type of work of the task: the timer reuses it.
- 2. The counter, running on the server.
- 3. The type of work of this entry, which can be changed before stopping.
- 4. Stop and save: one line in the timesheet.
- 5. Cancel: nothing is written.
The line written carries your agent record, the task's client, the type of work, the date and hours of the timer, and the reference "Tâche n° …". Find it in Timesheets › Time Entry (chapter 14).
The timer's messages
| Message | What to do |
|---|---|
| "Timer unavailable: Le chrono écrit dans la feuille de temps d'un agent : votre compte n'a pas de fiche agent dans ce cabinet…" (the reason comes from the server, in French) | Ask your administrator to create a record for you in Team › Agents |
| "Le chrono écrit une saisie de temps : il faut le droit « Feuilles de temps › Créer »." | Ask for this right in your role |
| "Choose the type of work: the timesheet entry requires it." | Choose it next to the counter: Stop and save, greyed out until then, becomes clickable |
| "A timer is already running on “…”." | Open that task and stop its timer first |
| "Le chrono tourne depuis plus de 24 heures…" | Click Cancel, then enter this time by hand |
My day by e-mail
Every working morning, around 7 a.m., this e-mail gives you your day before you even open the software. It is off to begin with: each person switches it on for themselves.
- Open My account: the three dots of your card at the bottom of the menu, then Notifications in the menu of sections.
- Switch on “My day” by e-mail. The message "“My day” will be sent to you every working morning." confirms it.
- To stop it, switch the same toggle off. The link at the bottom of each e-mail leads there.
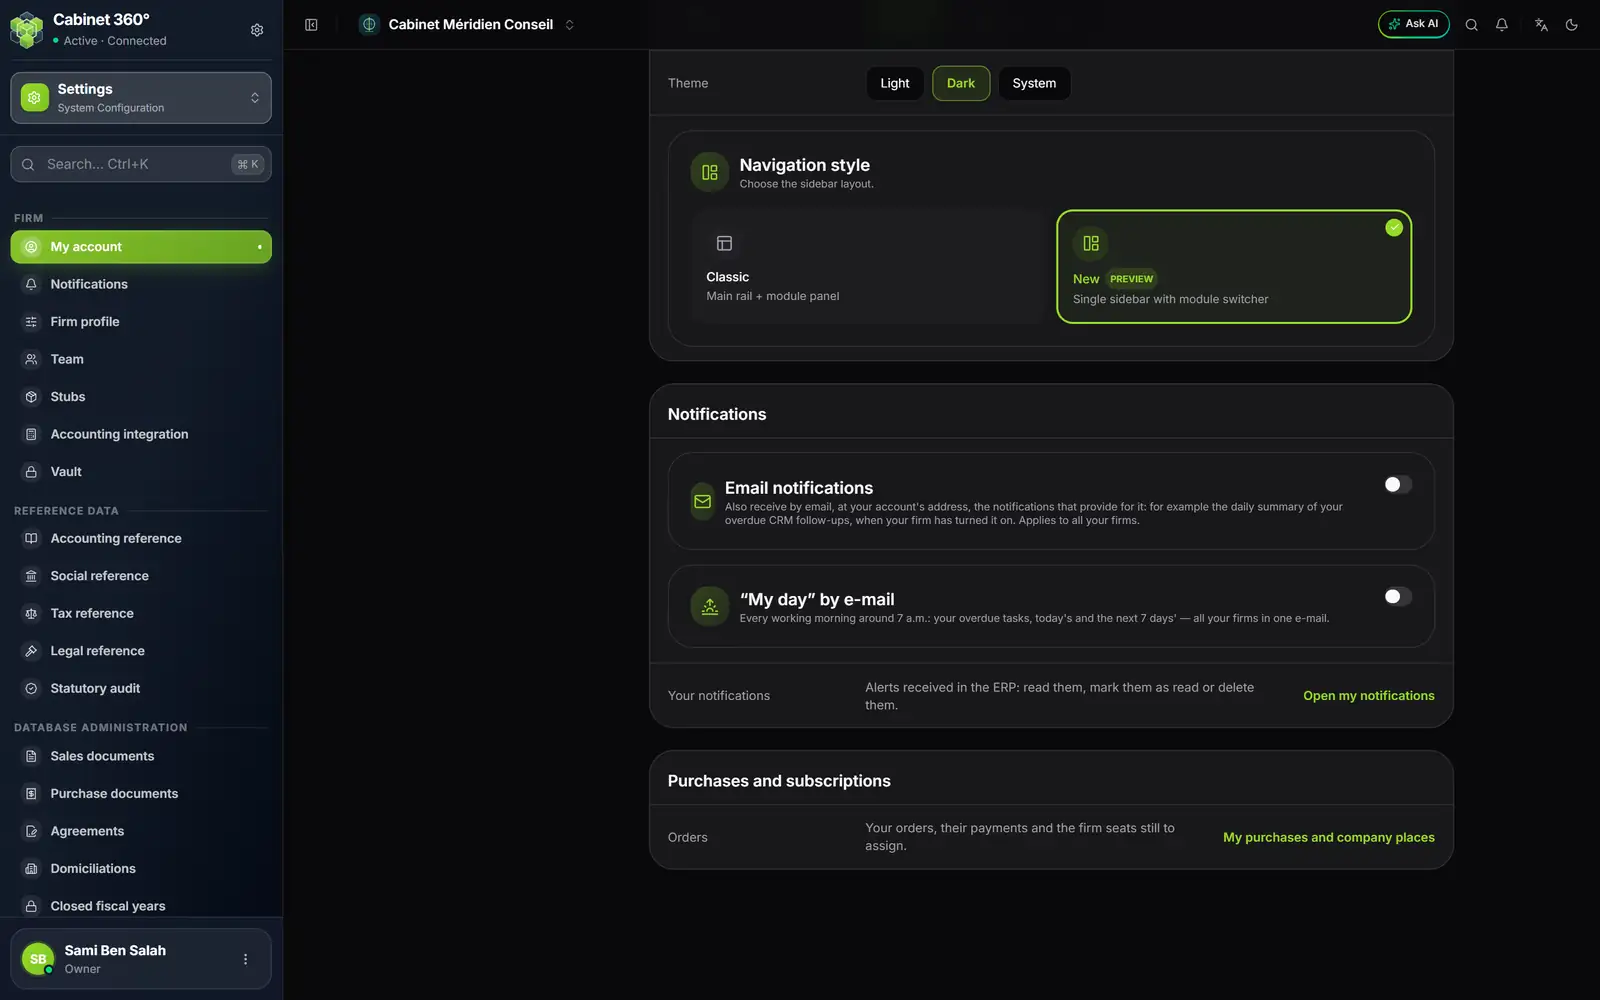
- 1. My account, in the settings menu.
- 2. Email notifications: a different setting, for notifications.
- 3. “My day” by e-mail.
- 4. Its switch.
The switch only appears in a firm that has the Tasks module, for whoever has the View right on the Tasks screen. To switch it on or off, you also need the Edit right on that screen.
What the e-mail contains
- Your Overdue tasks, Today's and The next 7 days', plus To approve. The tasks the ERP works out are there, alongside yours.
- Each row carries its link to the screen that does the work, and a link opens My day.
- A section shows at most 15 rows; its count is exact.
- A task without a date (the OCR inbox to check, a written task without a due date) stays on screen: it is not in the e-mail.
A CRM automation that creates tasks
An automation can create a task for you when a CRM event happens, for example a new lead arriving. It is set in the CRM's automations console.
Choose the action Create a task in “Tasks”, then set:
- the Task title, with its fields replaced in each task: {numero}, {client}, {libelle}, {regle};
- the assignee, optional;
- the due date, as a number of days, optional.
For a CRM rule, the task carries no client, and only {libelle} and {regle} are filled in: {numero} and {client} stay empty. It carries the record's link (Open the linked screen, chapter 9) and a due date moved to the first working day. A rule creates only one task per record.
The book « CRM & E-mailing » describes the automations console.
Prepare a task with the AI Assistant
The AI Assistant can read your day, your team and a task. It can also prepare a task from a sentence, such as "Remind me to chase LUMEA DESIGN on Friday for the statement": it works out the title, the due date, the client and the person, and shows you everything on a card. Nothing is created before you click Allow.
The assistant does not tick steps and does not complete tasks: it is up to a person to mark the work as done. These assistant tools belong to its Operations side: a firm that has Tasks without Operations does not find them there. The book « Artificial intelligence » describes the assistant.