
Before you start
The client must exist in IntegraSys, with:
- Human resources enabled in their Active services (Operations tab of the client record);
- a valid tax ID, key letter included: "00000000" is not enough;
- their bank accounts, if their salaries are paid by transfer (the transfer order reads them);
- a file in Accounting, if payroll is to be posted.
The HR Clients page
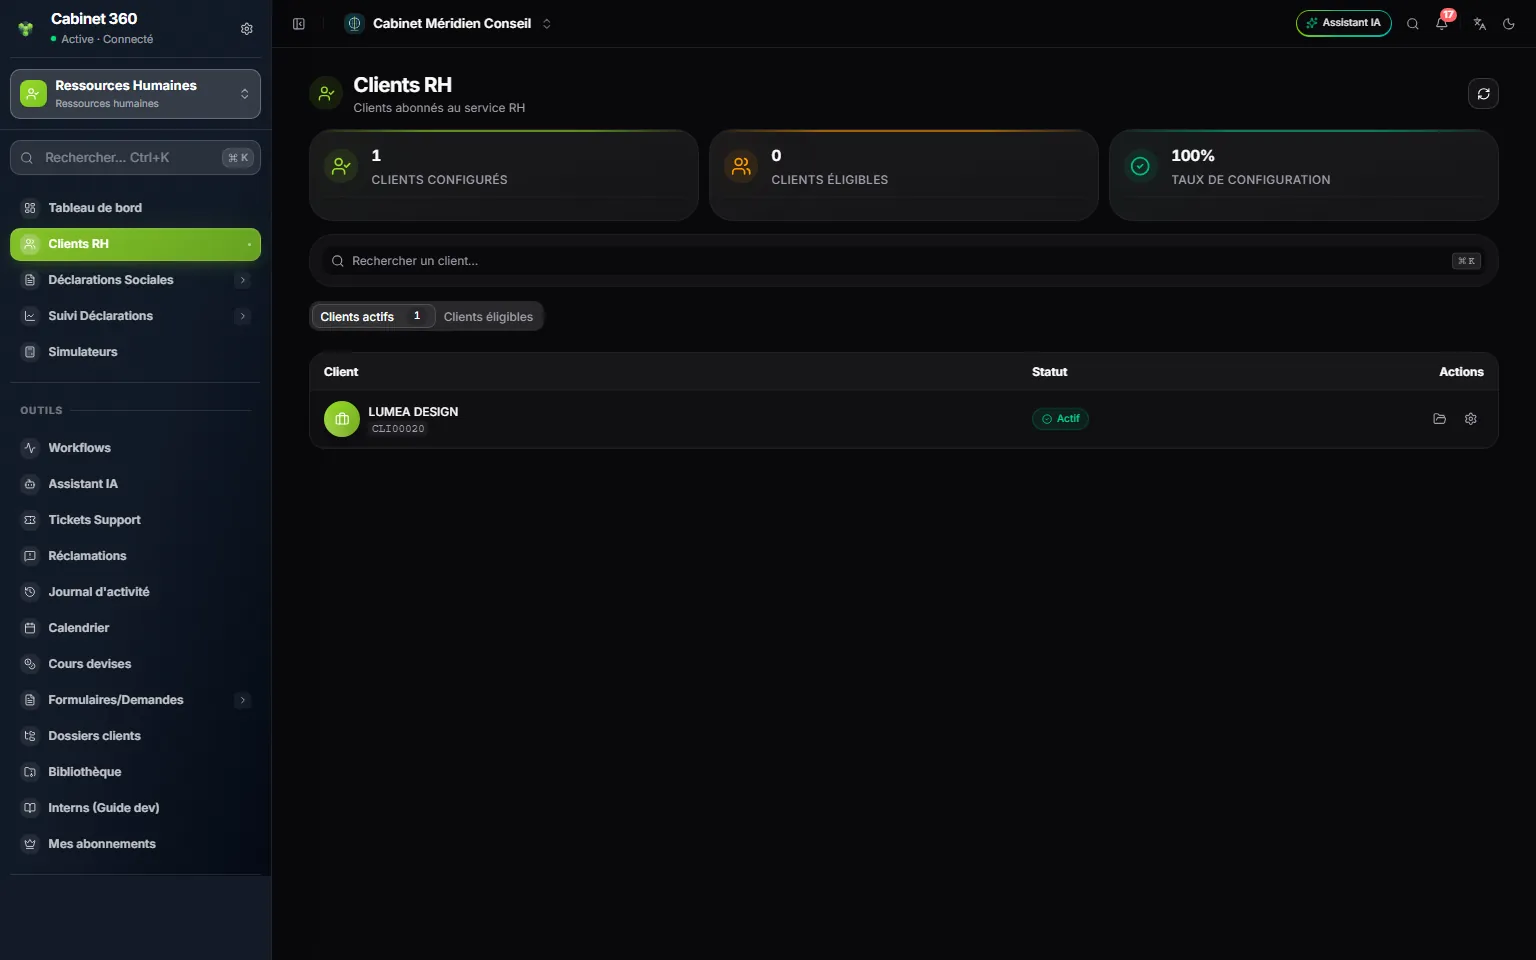
- 1. The counters: configured clients, eligible clients, configuration rate.
- 2. Two tabs: the open files (Active clients) and the clients waiting for theirs (Eligible clients).
- 3. At the end of the row: the folder to Open workspace, the gear to Configure.
A client appears in Eligible clients as soon as Human resources is ticked in their active services. Next to the search, the All account managers list shows only one account manager's clients, or those with No account manager.
Opening the file
- In Eligible clients, click the + (Configure) at the end of the client's row.
- Choose the Collective agreement, required. If no sector agreement covers the client, choose Droit commun — sans convention sectorielle (Code du travail) (general labour law, no sector agreement): the file will show only the items common to all files.
- Enter the Employer CNSS number, the Monthly leave entitlement (days), required, and the Onboarding date.
- Under File team, choose the Supervisor and tick at least one of the Team members: both are required to open the file.
- Click Create dossier: "HR client created" appears and the file's workspace opens on Payroll months; the client now appears in Active clients.
When it opens, the file receives the firm's catalogue of pay items: the common items, plus those of its agreement. The Onboarding date opens its first payroll year and its first payroll month.
The Company tab
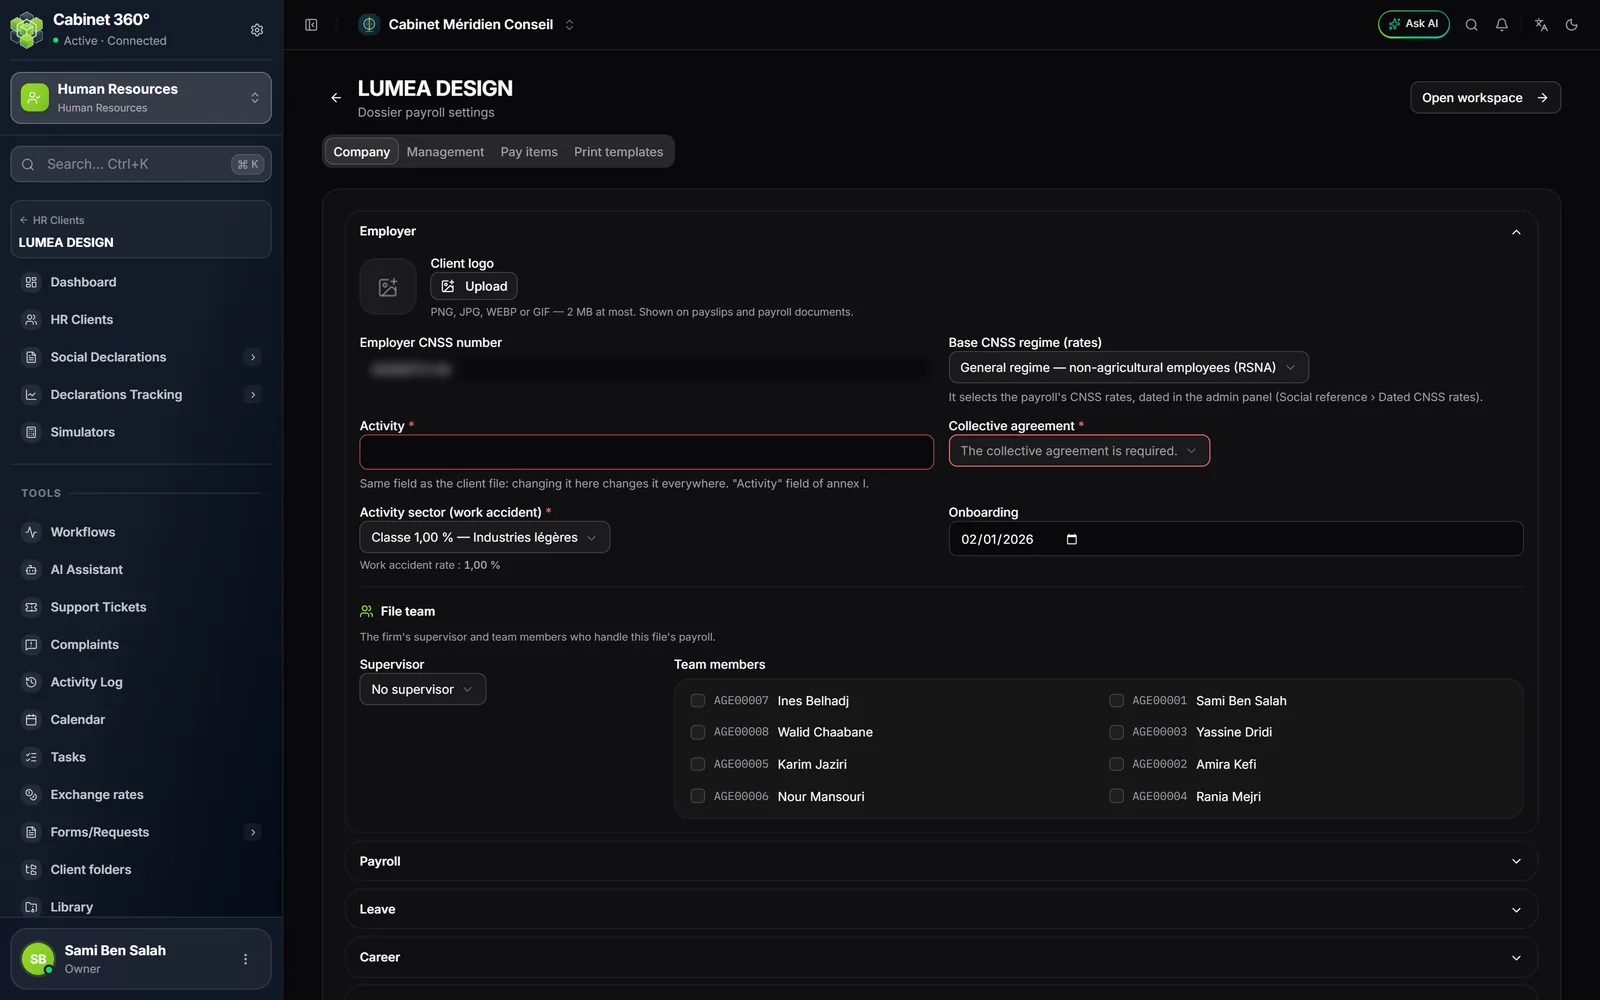
In Active clients, Configure opens the file's record, in four tabs: Company, Management, Pay items and Print templates. The Company tab sorts its settings into seven collapsible blocks, one open at a time. The first, Employer, starts with the Client logo (PNG, JPG, WEBP or GIF, 2 MB at most), used on some of the client's HR documents such as the mission order or the group insurance enrollment form.
| Block | What it sets |
|---|---|
| Employer | Employer CNSS number, Base CNSS regime (rates), Collective agreement, Activity sector (work accident), onboarding, file team |
| Payroll | Pay day, Payroll months / year, Days / month, hours per week, currency, Startup label date, TFP rate, FOPROLOS rate, Income tax calculation method, Loan pay item, mission order scale |
| Leave | Monthly leave entitlement (days), Leave calculation mode, Half-day leave, balance exceeded, exceptional leave durations |
| Career | Promotion frequency |
| Optional contributions | CAVIS — complementary scheme, Group insurance and its insurers |
| Contract end alerts | The alert delay per contract type (see Employment contracts) |
| Accounting setup | The payroll's journal and accounts (see Posting payroll to accounting) |
Employer
The Base CNSS regime (rates) sets the CNSS rates of the file's whole payroll: general scheme for non-agricultural employees, fully exporting company, agricultural employees. Each employee's own scheme (CIVP, Karama, Startup…) is chosen on their record.
The Activity sector (work accident) is required. The list is sorted by sector, then by sub-sector, each with its rate, which also shows below it: this is the rate the payslip applies for work accident.
Payroll
- Payroll months / year and Days / month: copied to each new employee, who can differ from them.
- TFP rate (2 %, or 1 % for a manufacturing industry) and FOPROLOS rate (1 %, or 0 %): required, applied by the file's payroll.
- Income tax calculation method: 1 — Monthly proportional (agreed net salary), the default, 2 — Annual spread over the month (agreed gross salary) or 3 — Annual (settlement). See How payroll calculates.
- Startup label date: for a labelled company, the starting point of the 8 years of its employees' Startup scheme.
- Loan pay item: the deduction item under which the payslip prints the month's loan instalment; empty, 6300 Prêts (loans).
Further down, Mission order — allowances by employee category starts with the Mission expenses posting: the pay item that receives the mission orders. While it is empty, no mission order can be entered. Then Add a category (executive, supervisor…), with its Mileage allowance (TND / km) and its Daily allowance (TND / day).
Leave
The Monthly leave entitlement and the Leave calculation mode (working or calendar days) are required. Half-day leave is on by default. Leave balance exceeded says what happens when a paid leave goes beyond the balance: Ask for confirmation or Accept without asking. The legal durations of exceptional leave (marriage, birth, death…) are already set: the file can raise them, never lower them. All these settings are copied to each employee's record, where they can be changed.
Optional contributions
- CAVIS — complementary scheme: turn it on and give its Start date.
- Group insurance: turn it on, then choose the contribution type. Proportional: an employee rate and an employer rate, on gross pay. Fixed: an amount per employee and per month, whatever their salary.
The Insurers of the fiscal year block chooses the file's insurance companies, payroll year by payroll year: Add an insurer…, with the Policy no. if you have it. Each addition is saved at once. Copy previous year copies the list of the year before.
Social contribution rates
Below the blocks, Social contribution rates offers the employer and employee CNSS rate, work accident, CAVIS and the employer KARAMA rate, with its own Save button. This block is not read by the payslip: payroll's rates are those of the base regime, the activity sector and the optional contributions.
The client's management, pay items and templates
Management: the managers are those of the client record (Open the client's management to add one). For a manager affiliated to the self-employed scheme, turn on their switch, then fill in their Manager's CNSS number, their RTNS contribution (sector / class) and their Start date. The amount shown is that of their class today: when the CNSS publishes a new grid, it changes with nothing to re-enter. These managers feed the CNSS Self-employed declaration.
Pay items: the client's catalogue, first the Items for all files, then those of their agreement. You neither add nor delete here: you turn each item on or off for this client, set its Default amount directly in the list, and the pencil opens its settings.
- Fixed or variable (gross earning): Fixed is paid in full; Variable in proportion to the month's attendance.
- Frequency: Permanent (paid every month) or Occasional (paid once: 13th month, balance-sheet bonus, back pay…). An occasional item is always fixed.
- Printed: unticked, the item is still paid and counted, but its line does not show on this client's payslips.
A changed Default amount passes to the employees who kept the old one; an employee who had entered their own keeps it. Below the list, Lines calculated by the payslip lets you choose, for this client only, whether or not to print each calculated line; NET A PAYER (net pay) is always printed.
Print templates: the read-only list of the file's templates. A template is assigned to each contract category in the file's menu, Print templates (see Employment contracts).
Entering the workspace
In Active clients, click the client's row (or Open workspace), then choose a payroll year in the Choose a fiscal year window: the Payroll months page opens. If the window says "No fiscal year for this dossier. Create one to get started.", the onboarding date was empty: click Manage fiscal years, then New fiscal year.