
Before you start
- The right to create disbursements.
- Two numbering series: Disbursement and Pre-invoice (chapter 2). Without them, a reminder appears and Create disbursement stays greyed out.
- The client exists (chapter 4).
- A sales article that describes the expense, for example “Registry fees” (chapter 5). It forms the line of the pre-invoice.
Creating a disbursement
- Click New disbursement.
- Enter the Disbursement date, the Amount (TND) actually paid and the Client.
- Choose the Reference: the article that describes the expense. It is required. If it is missing, the + next to it creates it and brings you back here.
- The Description takes over the article's: change it if needed. Add the Document no. and the Voucher no. of the supporting document.
- Under Additional details, give the Payment method and the Bank. Add Notes if needed.
- Click Create disbursement. The message “Disbursement DEB00001 has been created successfully” appears.
The disbursement's page opens. It is already Pre-invoiced: its pre-invoice was created at the same time. The Linked pre-invoice box offers View pre-invoice.
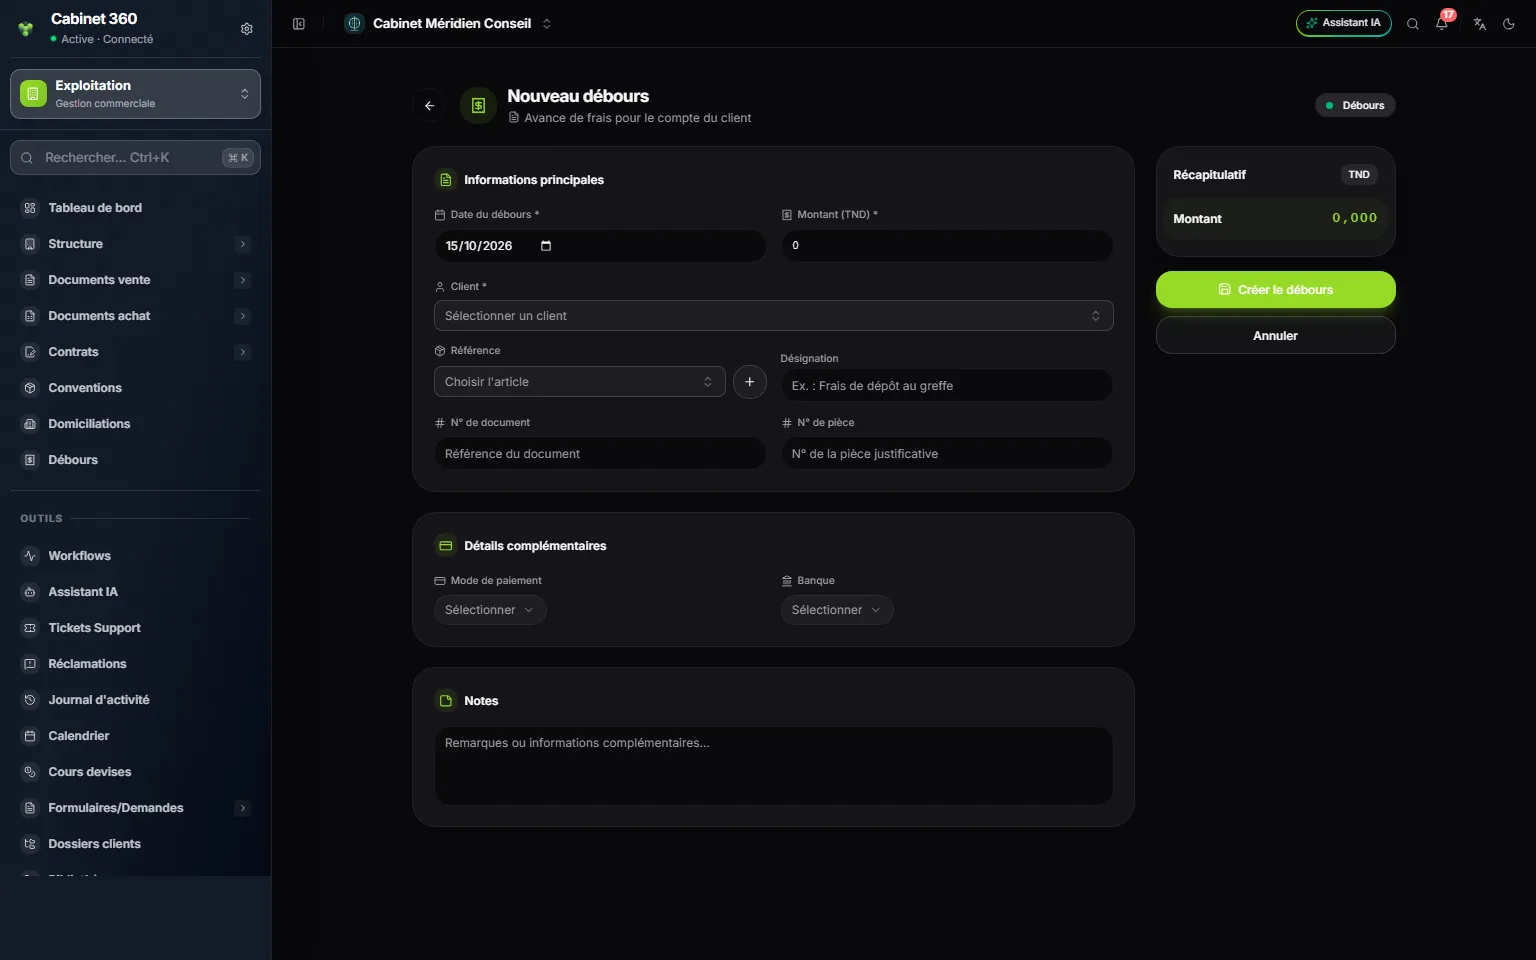
- 1. Date and Amount (TND): the sum actually paid.
- 2. Client: the one on whose behalf you paid.
- 3. Reference: the sales article; the + creates it on the spot.
- 4. Payment method and Bank.
- 5. Create disbursement also creates the pre-invoice.
The disbursement list
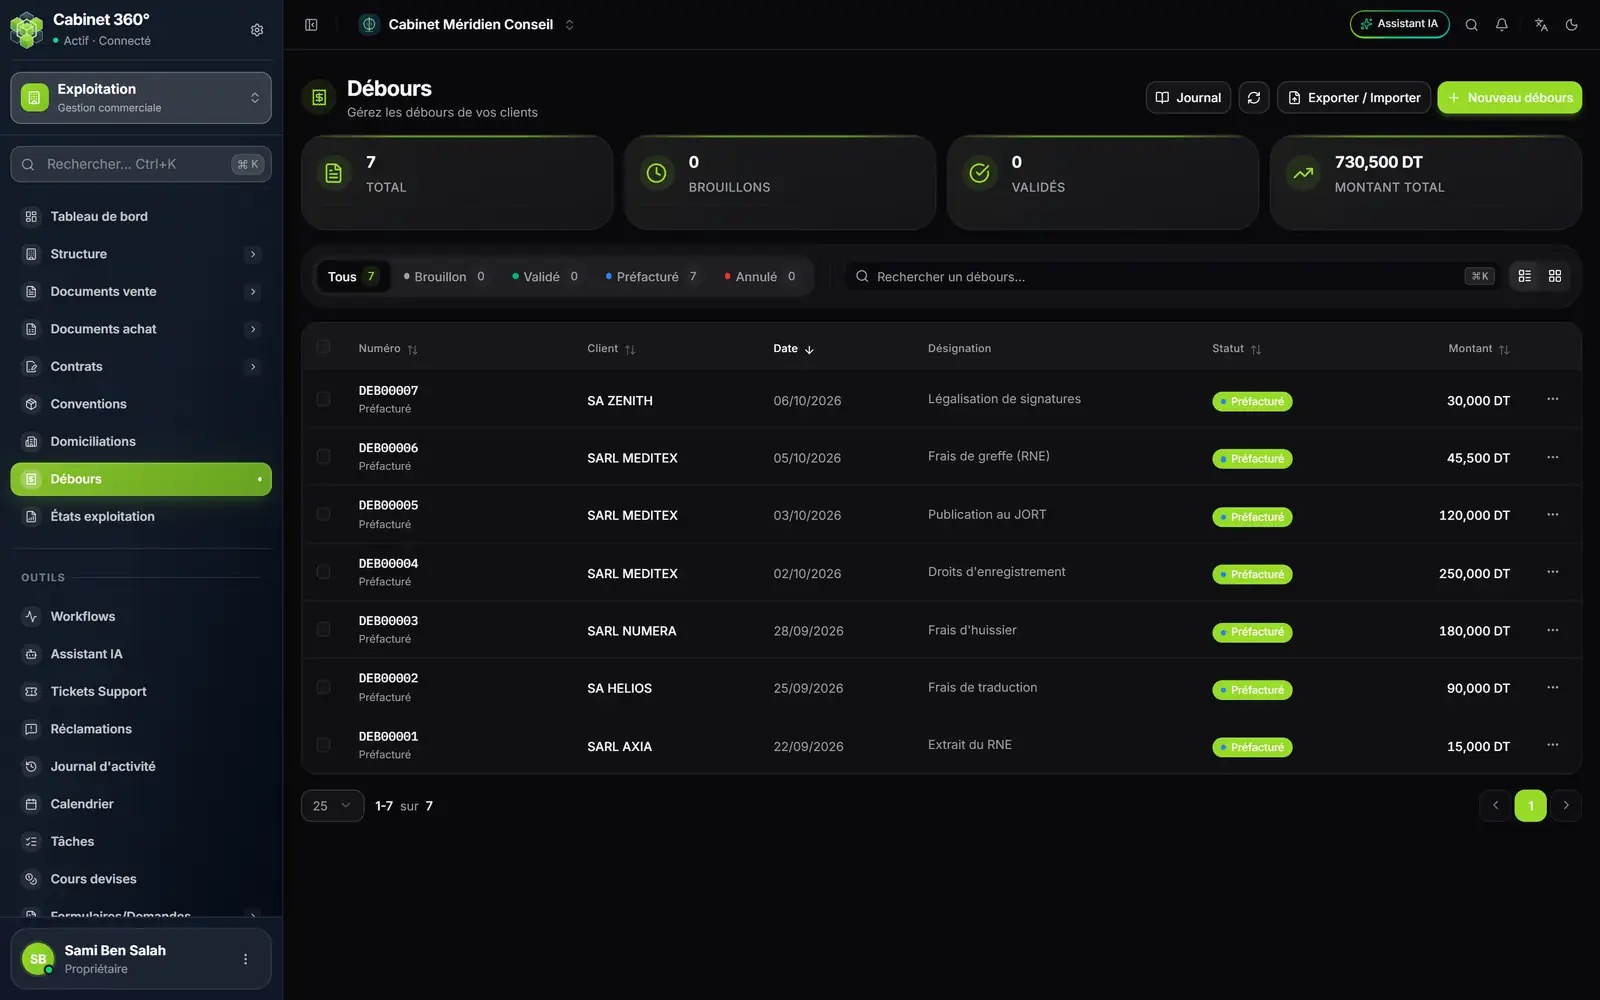
- 1. Journal: the list for a period, in PDF, Excel or CSV.
- 2. Export / Import the disbursements.
- 3. The cards: total, drafts, validated, total amount.
- 4. The statuses: Draft, Validated, Pre-invoiced, Cancelled.
- 5. Pre-invoiced: the client's pre-invoice exists.
Each disbursement goes through these statuses:
| Status | What it means |
|---|---|
| Draft | Entered, not committed yet. |
| Validated | Confirmed, with no pre-invoice yet. |
| Pre-invoiced | Its pre-invoice exists. This is the status of a disbursement created on this screen. |
| Cancelled | Withdrawn. |
The ⋯ menu of a row offers what its status allows:
| Status | What the menu offers |
|---|---|
| All | View details |
| Draft | Edit, Validate, Cancel, Delete |
| Validated | Edit, Generate pre-invoice, Cancel |
| Pre-invoiced | Nothing more: its pre-invoice carries the rest. |
Correcting a disbursement
A Draft or Validated disbursement can be corrected: ⋯, then Edit. A reference once chosen can no longer be removed.
A disbursement created on this screen is Pre-invoiced straight away. In that case, correct the mistake on its pre-invoice, while it is still a draft.
The two other doors
You can also record a disbursement at the moment you pay it. The disbursement and its pre-invoice are then created together, in the client's name.
| Door | Where | What happens |
|---|---|---|
| Supplier Payment | Finance › Supplier Payment, type Disbursement | Validating the order creates the disbursement and its pre-invoice, with the status Validated. |
| Cash Register | Cash Register › Expense, choice Disbursements | Saving creates the disbursement and its pre-invoice, with the status Validated. The message names both numbers. |
In both cases, the Reference is required, as here. Cancelling the order or the expense cancels the disbursement and its pre-invoice; this is refused if the pre-invoice is already invoiced or settled. The details are in the book Finance & Cash Register.
The disbursement journal
Click Journal, at the top of the list. The Journal des Débours window opens; its labels are in French. Choose the Date début (start date) and the Date fin (end date), then the Format d'export (export format): PDF, Excel or CSV. Cancelled disbursements are not included. The PDF carries the header and footer of the Operations reports (chapter 15).
A disbursement is not printed on its own: the client receives its pre-invoice, then its invoice.