
Opening My account
My account is open to everyone, whatever their role. You also reach it through the three dots next to your name, at the bottom of the menu, then Profile.
The page reads like the firm profile: a menu of five sections on the left, and each piece of information on its own line, with its button at the end.
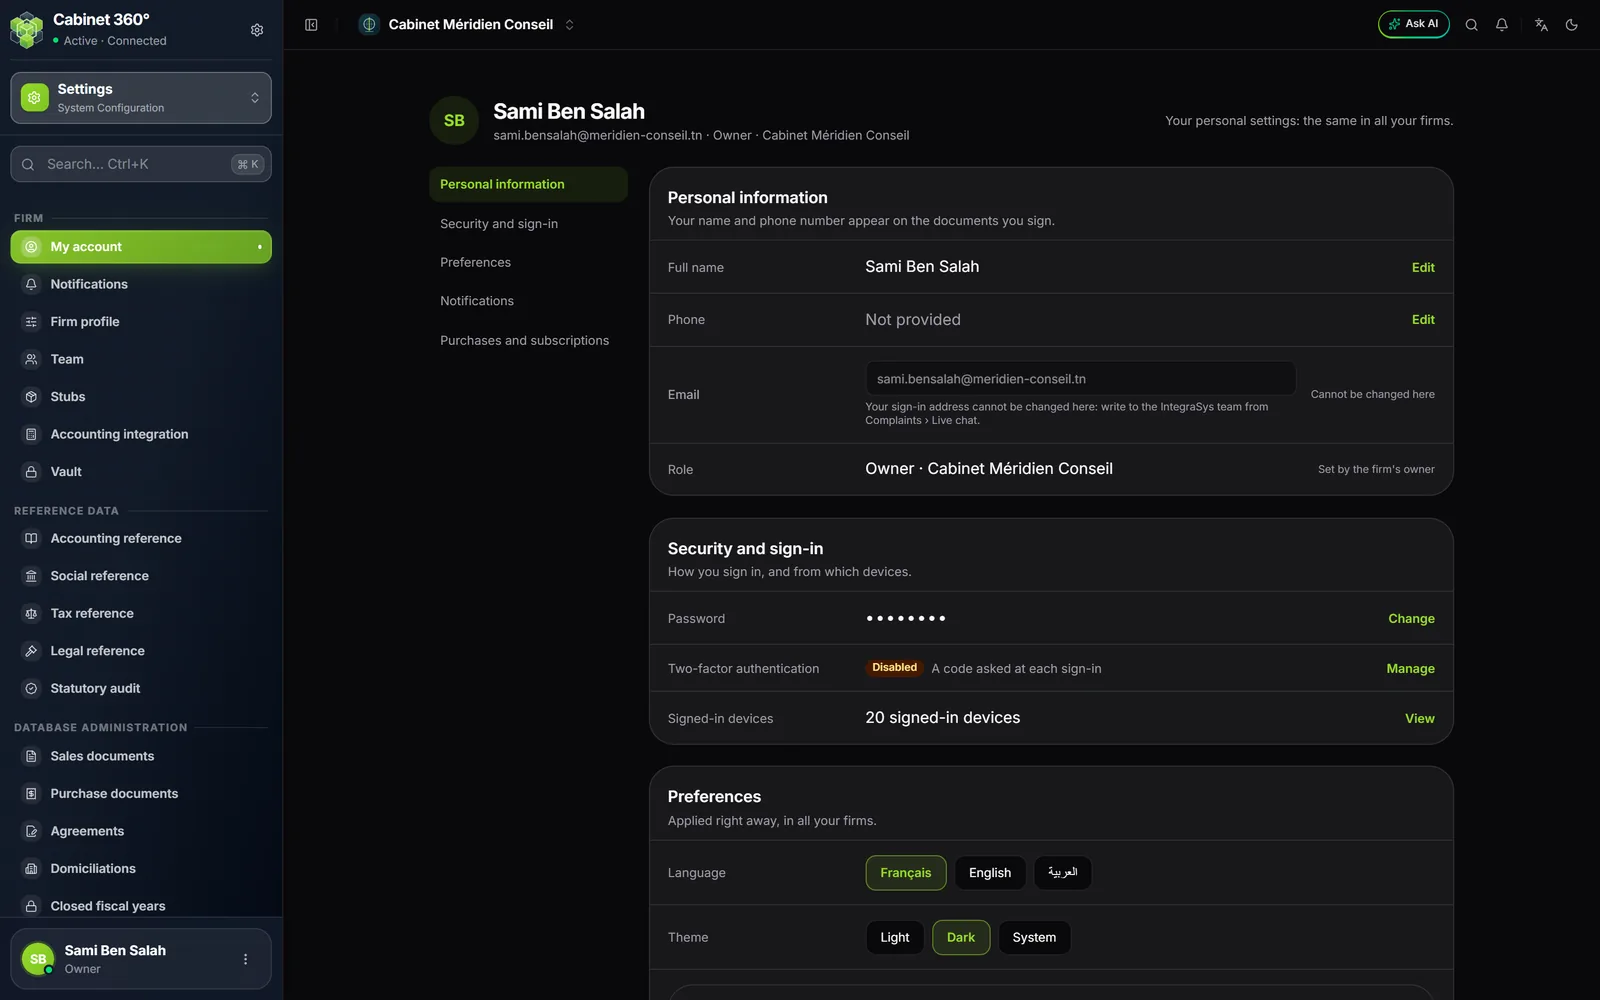
Personal information
| Line | What you can do |
|---|---|
| Full name | Edit: your first and last name |
| Phone | Edit |
| Nothing here: it is marked « Cannot be changed here ». To change it, write to the IntegraSys team from Complaints › Live chat. | |
| Role | Your role and the open firm. It is set by the firm's owner or an administrator. |
Security and sign-in
Three lines: Password (Change button), Two-factor authentication (enabled or disabled, Manage button) and Signed-in devices (how many, View button).
Changing your password
Change opens three boxes: the current password, the new one (at least 8 characters, with an upper-case letter, a lower-case letter, a digit and a special character; a bar shows its strength) and its confirmation.
Turning on two-factor authentication
Two-factor authentication adds a step to signing in: after the password, IntegraSys asks for a 6-digit code shown by an app on your phone (Google Authenticator, Microsoft Authenticator, Authy…). Someone who knows your password cannot get in without your phone.
- On the Two-factor authentication line, click Manage, then Enable 2FA.
- Type your Current password and click Next. A QR code appears.
- In your phone's app, add an account and scan the QR code (or type the Manual key). Click Next.
- Type the app's 6-digit code and click Confirm.
- Ten recovery codes appear, once only. Download or copy them, then keep them away from your phone. Tick the confirmation box and click Finish.
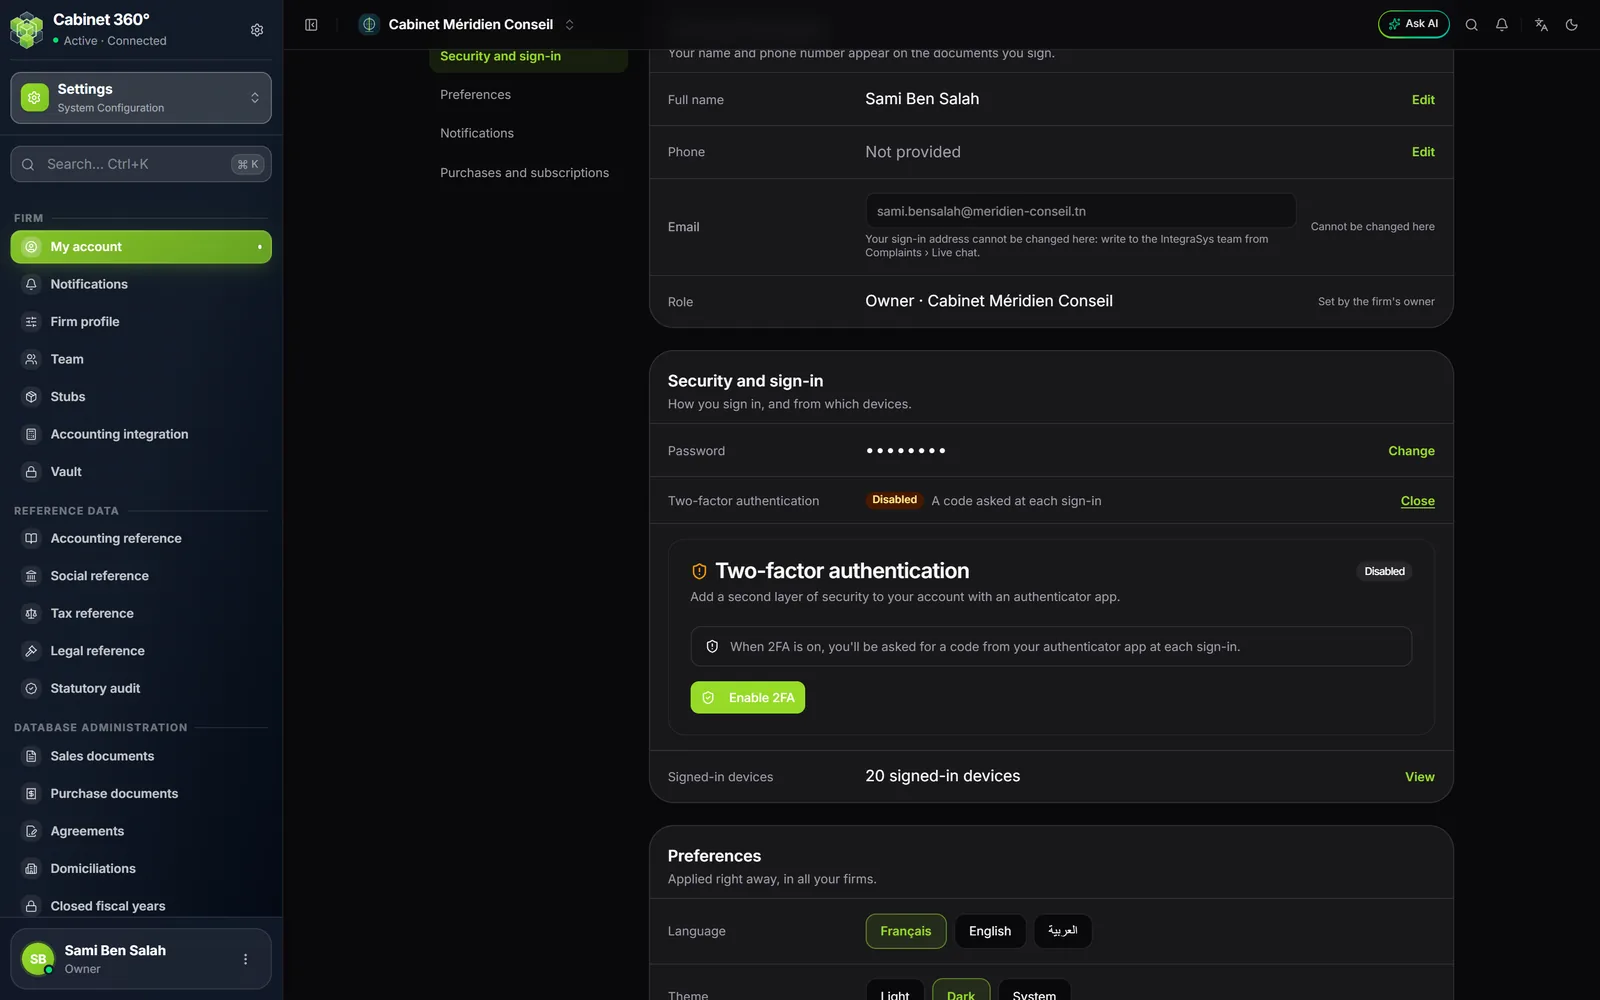
At the next sign-in, the Two-step verification screen asks for the app's code.
Each person turns it on for their own account: an administrator cannot do it for you.
Signed-in devices
View lists the devices where your account is open: this one, then the others. A device you do not recognise? Click Log out on its line, or Log out all other devices, and confirm with your password. Then change your password.
Preferences: language, theme, menu
The Preferences section says: « Applied right away, in all your firms. »
| Line | Choices |
|---|---|
| Language | Français, English or Arabic (its button is written in Arabic). The page reloads in the chosen language. |
| Theme | Light, Dark or System (your computer's). |
| Navigation style | Classic or New: two layouts of the left menu, with the same screens. This choice applies to this browser only. |
In Arabic, the screen reads from right to left and the menu moves to the right. In all three languages, dates stay in the dd/mm/yyyy format and amounts are written 1 234 567,890.
The shortcut in the top bar
At the top right, the languages icon also offers Français, English and Arabic, and the icon next to it the theme Light, Dark or System. This shortcut changes the display of this browser, without touching your profile. To keep your choice in your profile, go through My account › Preferences.
Notifications
The Notifications section of My account sets Email notifications: one switch, valid in all your firms. If the firm has the Tasks module, a « My day » card is added. Open my notifications leads to the list.
The Notifications screen gathers the ones you received, with the All and Unread filters. Mark all as read marks them all as read; each one can be marked as read or deleted.
Purchases and subscriptions
The last section leads to My purchases and company places: the orders paid with your account (see My Subscriptions).
Arranging the modules your way
The menu shows the modules in a fixed order: Operations, Finance, Fixed Assets, CRM, Accounting, Tax, Human Resources, Legal, then the others; Settings always stays last. You can change it.
- Open the list of modules (the button at the top of the menu), then click Reorder modules, at the bottom of the list. In the Classic style, it is the small two-arrow icon to the right of Navigation.
- Drag a module to its new place, or use the arrows to the right of its name.
- Click Save.
This order applies only to you, in this firm: My sidebar. The owner and administrators also see Whole firm: the order they save then applies to everyone who has not arranged their own sidebar. Back to the firm's order clears your arrangement; in Whole firm mode, Back to the default order restores the starting order.